This feature is not yet available in workflow-py. See our Roadmap for feature parity plans and Changelog for updates.

Introduction

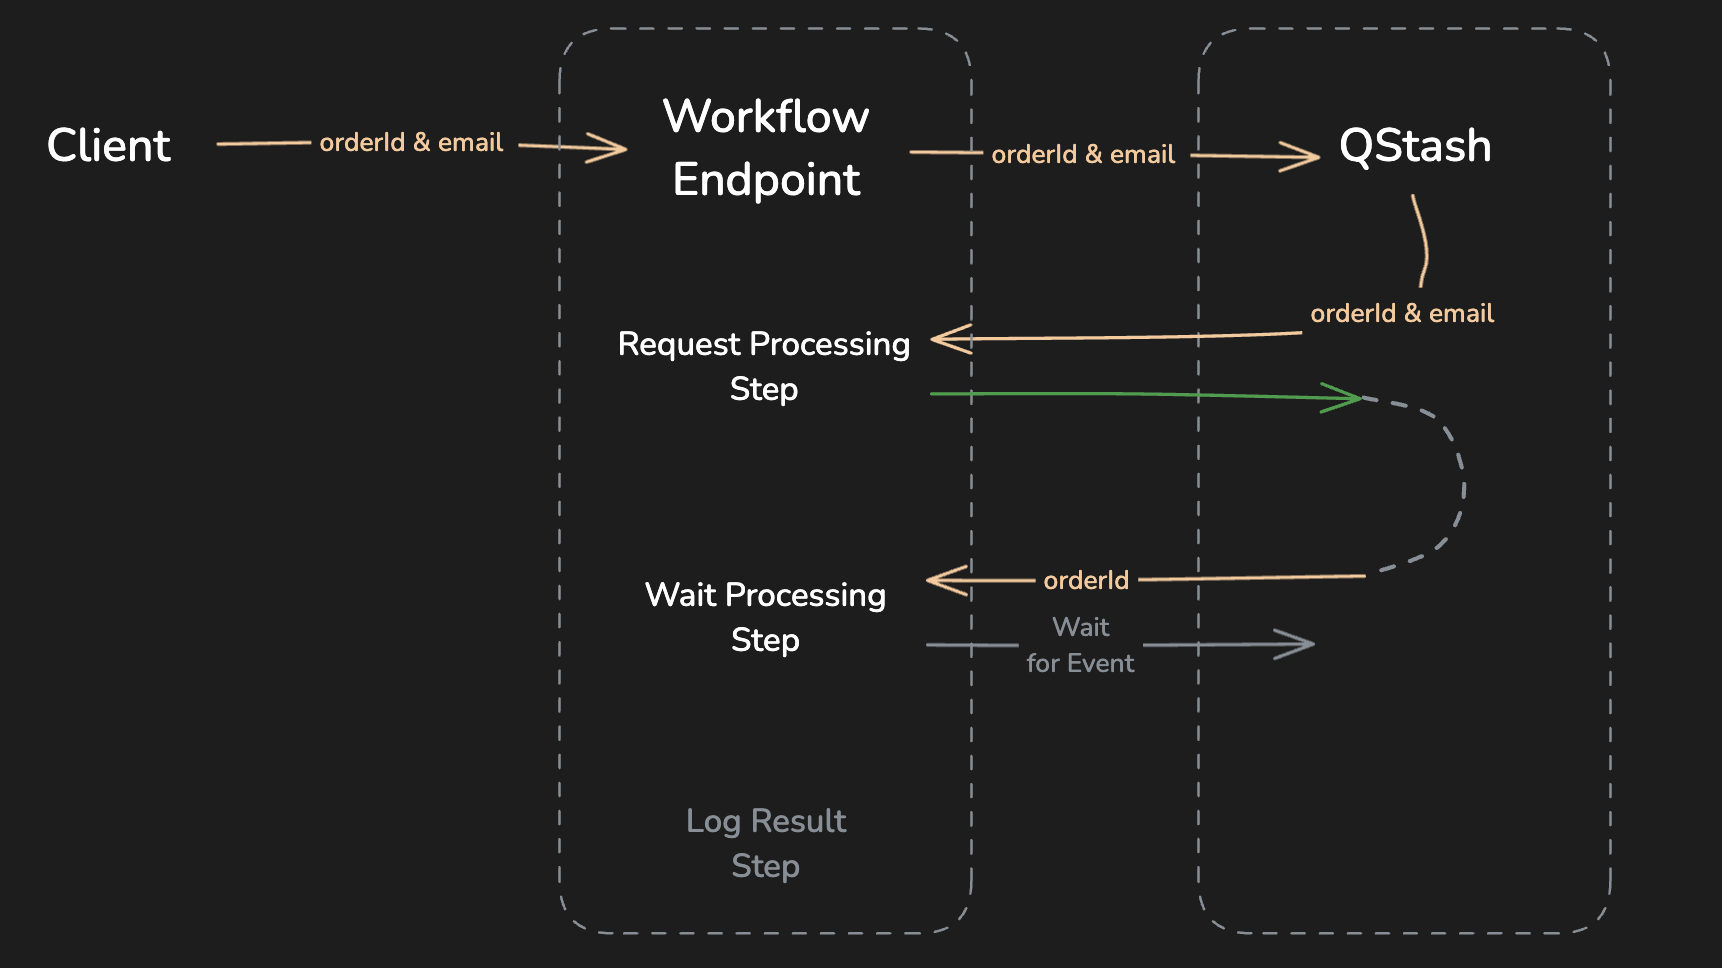
This example demonstrates how to handle order processing using Upstash Workflow. The workflow will wait for an external system to process an order and resume once it is ‘notified’. See our documentation for more details about events.

Use Case

Our workflow will be:

  1. Receive an order request.
  2. Send an email to request order processing.
  3. Wait for an external event that indicates the order has been processed.
  4. Handle timeout scenarios if the event is not received in time.
  5. Save the results

Code Example

import { serve } from "@upstash/workflow/nextjs";

export const { POST } = serve(async (context) => {
  const { orderId, userEmail } = context.requestPayload;

  // Step 1: request order processing
  await context.run("request order processing", async () => {
    await requestProcessing(orderId)
  })

  // Step 2: Wait for the order to be processed
  const { eventData, timeout } = await context.waitForEvent(
    "wait for order processing",
    `order-${orderId}`,
    {
      timeout: "10m" // 10 minutes timeout
    }
  );

  if (timeout) {
    // end workflow in case of timeout
    return;
  }

  const processedData = eventData;

  // Step 3: Log the processed order
  await context.run("process-order", async () => {
    console.log(`Order ${orderId} processed:`, processedData);
  });

  // Step 4: Send a confirmation email
  await context.run("send-confirmation-email", async () => {
    await sendEmail(
      userEmail,
      "Your order has been processed!",
      processedData
    );
  });
});

Code for notifying the worklfow:

import { Client } from "@upstash/workflow";

const client = new Client({ token: "<QSTASH_TOKEN>" })
const orderId = "1324"

await client.notify({
  eventId: `order-${orderId}`,
  eventData: { deliveryTime: "2 days" }
});

Code Breakdown

1. Requesting Order Processing

In its first step, we call a method to request processing of the order in the request payload:

await context.run("request order processing", async () => {
  await requestProcessing(orderId)
})

You can imagine that this step sends an email to the company responsible for the delivery.

2. Waiting for the Event

Next, the workflow waits for the order to be processed. It uses the waitForEvent method to pause execution and listen for the event. A timeout of 10 minutes (600 seconds) is applied to avoid indefinite waiting.

const { eventData, timeout } = await context.waitForEvent(
  "wait for order processing",
  `order-${orderId}`,
  {
    timeout: "10m" // 10 minutes timeout
  }
);

if (timeout) {
  // end workflow in case of timeout
  return;
}

The workflow listens for the event with the ID order-${orderId}. When the external service notifies the workflow with this ID, the workflow resumes. If no event is received in time, the timeout ensures the workflow doesn’t hang.

3. Processing the Order
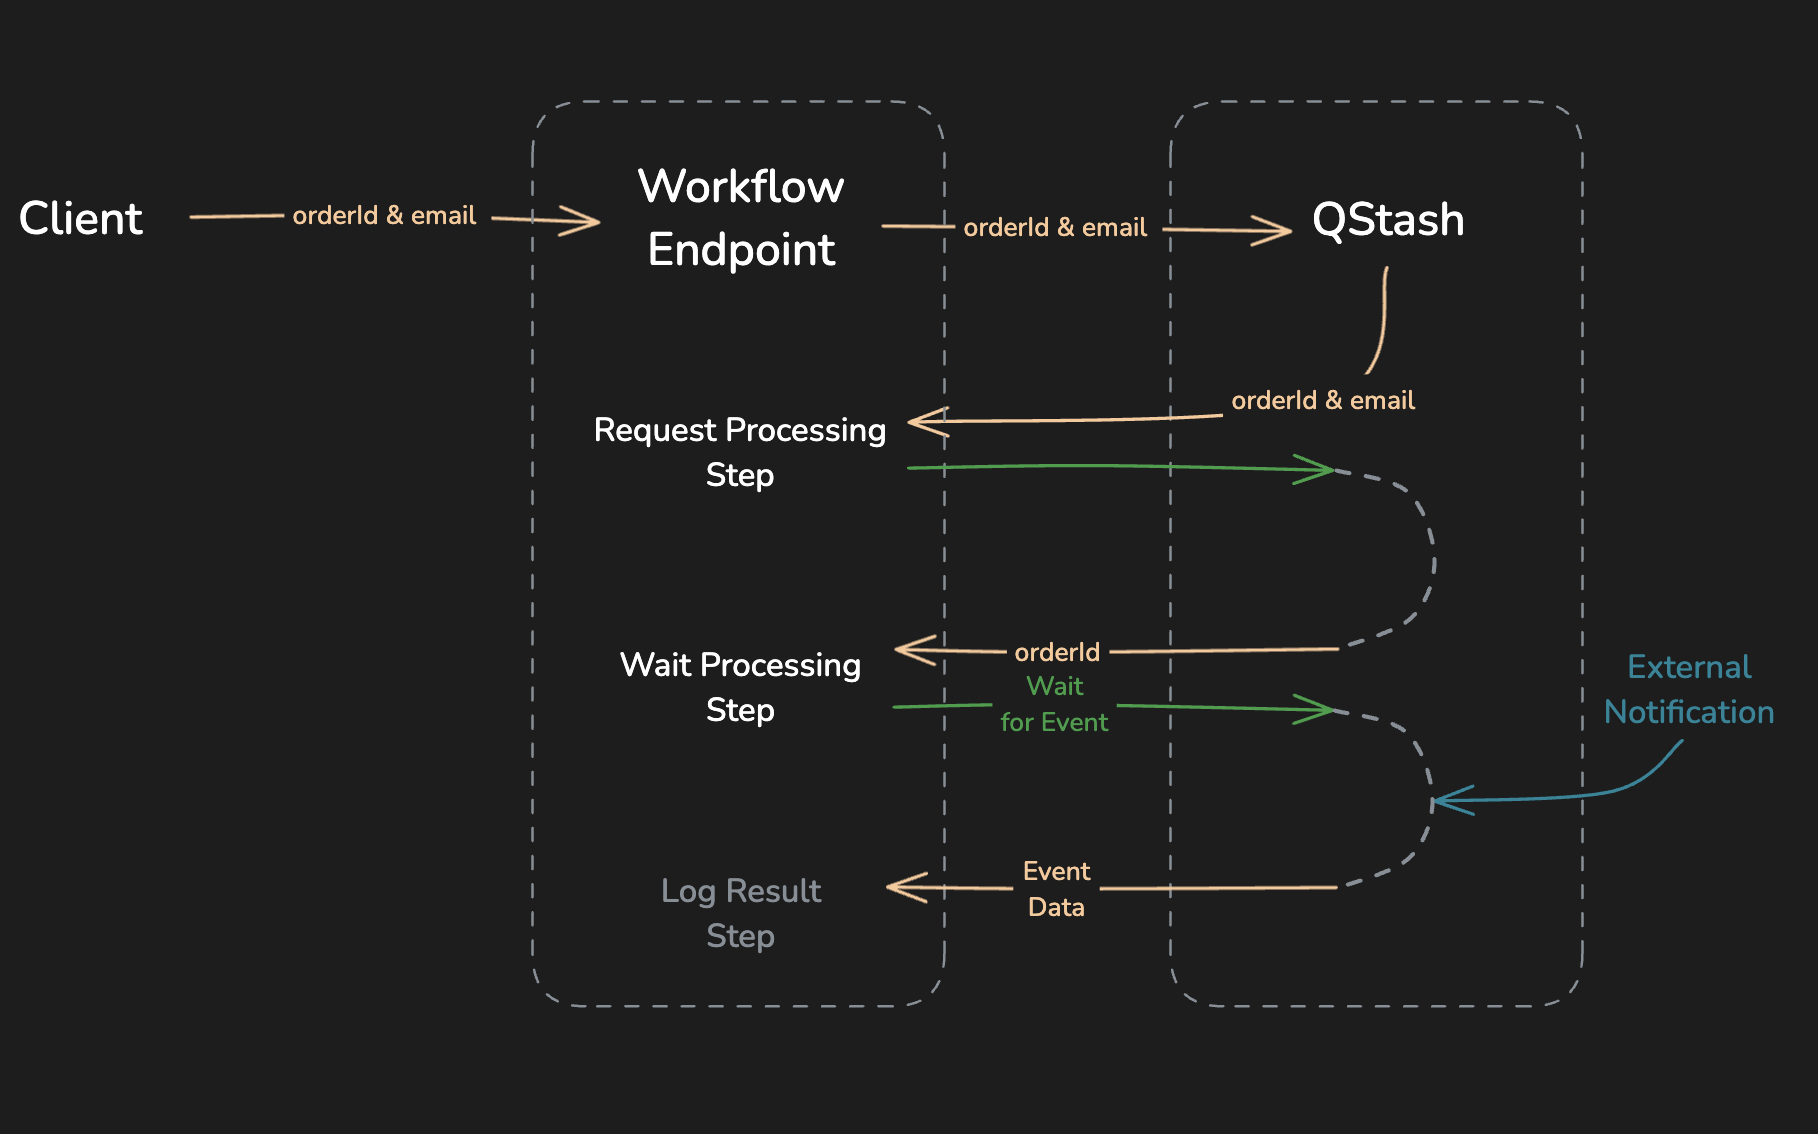
Once the workflow resumes, the order data (eventData) is logged. This step could include updates to the database, inventory adjustments, or other backend operations specific to order processing.

await context.run("process-order", async () => {
  console.log(`Order ${orderId} processed:`, processedData);
});

4. Sending a Confirmation Email

Once the order is processed, the workflow sends a confirmation email to the user.

await context.run("send-confirmation-email", async () => {
  await sendEmail(
    userEmail,
    "Your order has been processed!",
    processedData
  );
});

External Event Notification

To notify the workflow that the order has been processed, the external system sends a notification to the workflow with relevant data using the notify method from the Client. Alternatively, you can use context.notify method.

import { Client } from "@upstash/workflow";

const client = new Client({ token: "<QSTASH_TOKEN>" });
const orderId = "1324";

await client.notify({
  eventId: `order-${orderId}`,
  eventData: { deliveryTime: "2 days" }
});

Key Features

  1. Asynchronous Event Handling: The workflow waits for an external event (order processing) to occur and only resumes once the event is received.
  2. Timeout Control: A timeout mechanism ensures that the workflow doesn’t hang if the event isn’t received within the expected time.
  3. Order Processing: Once notified, the workflow handles order processing and sends a confirmation email to the customer.
  4. External Event Notifications: The external system can notify the workflow, providing the necessary data to resume execution and complete the process.